Automatic installation of a plugin is easy and you can also install on manually. It will involve manually downloading a plugin, uploading and activating it.
Make sure you already downloaded a zip file of the plugin to your desktop.
1. Login to your WordPress admin dashboard.
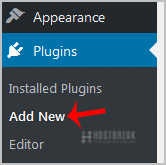
2. Under the dashboard menu, hover your mouse over "Plugins" and click on "Add New".
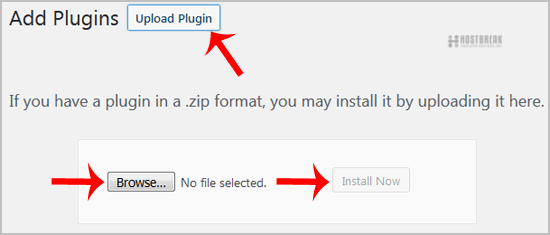
3. Click on ��Upload Plugin�� and then on ��Browse��. Chose your plugin��s zip file and then click on ��Install Now��.
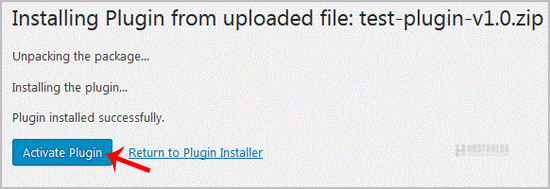
4. Click on ��Activate Plugin��.
Note: The newly activated plugin will show in the sidebar menu. If a setup of the plugin is required, it will show an option to complete it.
How to Manually Install a Plugin in WordPress?
Related Articles
How to Disable WP-Cron (wp-cron.php) for Faster Performance
How to Disable WP-Cron (wp-cron.php) for Faster Performance CRON jobs are used to schedule tasks...
How to enable XMLRPC in WordPressThe XMLRPC creates attack vector due to various issues related to it. Due to this reason, it is...
Wordpress Security Instructions How to Change the Password of a Wordpress Account?If you are logged in into your wordpress admin account, you can easily change your password.1....
How to remove your post in Wordpress?You can remove your published or draft post in Wordpress.1. Login to your WordPress admin...