This article explains how to setup email account on following email clients:
- Outlooks 2019
- Outlooks 2010
- Outlook 2007
- Outlook
- Outlook Express
Tips
-
You can find your actual mail server settings in cPanel > Email Accounts > Connect Devices.
-
Use IMAP if you want to access mail from multiple devices (phone, desktop, webmail).
-
Use POP3 only if you want to download and keep emails on one device.
Outlook 2019 Email Configuration (Manual Setup)
Step 1: Open Outlook 2019
-
Go to File > Add Account
Step 2: Enter Your Email Address
-
Type your full email address (e.g.,
yourname@yourdomain.com) -
Click Advanced options
-
Tick Let me set up my account manually
-
Click Connect
Step 3: Choose Account Type
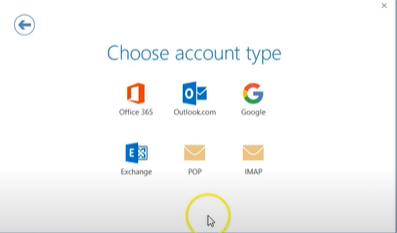
Select IMAP or POP (IMAP is recommended)
Step 4: Enter Mail Server Settings (Non-SSL)
For incoming mail, enter mail.yourdomain.com as the server.
-
If you selected IMAP, use port 143.
-
If you selected POP, use port 110.
-
Make sure to select "None" for the encryption type.
For outgoing mail (SMTP), also enter mail.yourdomain.com.
-
Use port 26.
-
Select "None" for encryption as well.
Your username will be your full email address (e.g., yourname@yourdomain.com) and the password is the one you set for the email account in cPanel.
Step 5: Click Next
Outlook will test the settings.
If correct, you’ll see a green Checkmark.
Step 6: Click Done
Your email is now configured and ready to use.
How to set up Outlook 2010
To manually set up your email account, just follow the instructions below.
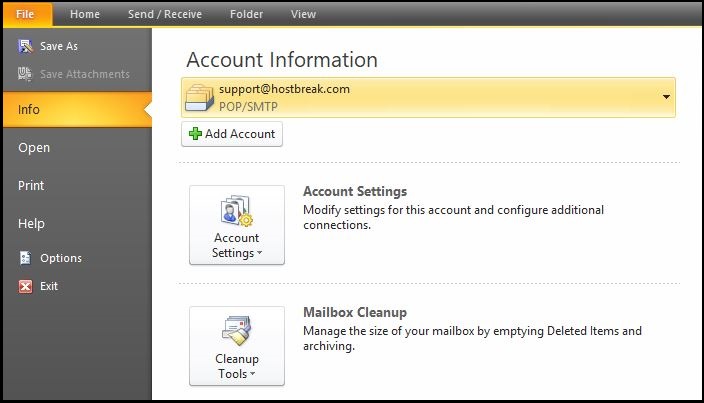
1. Open Microsoft Outlook 2010. Click File, and then click Add Account.
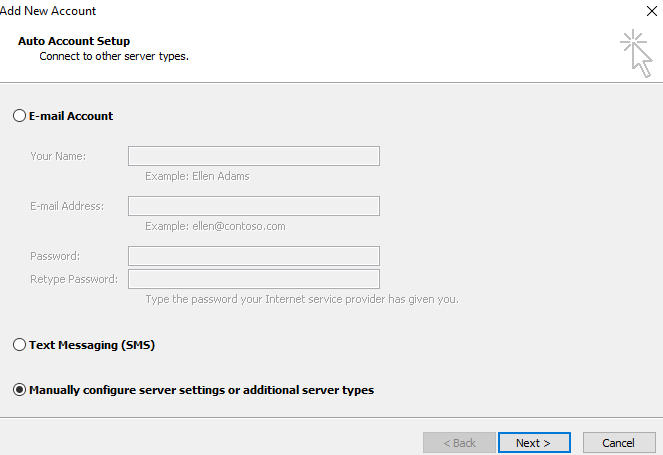
2. At the bottom, select Manually configure server settings or additional server types, and click Next.
3. Select Internet E-mail, and click Next.
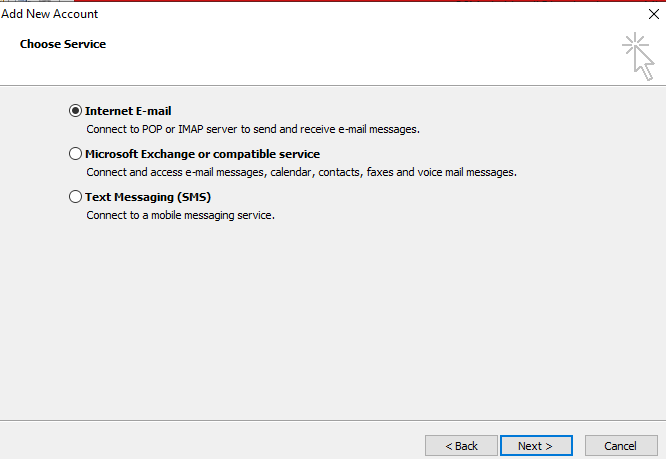
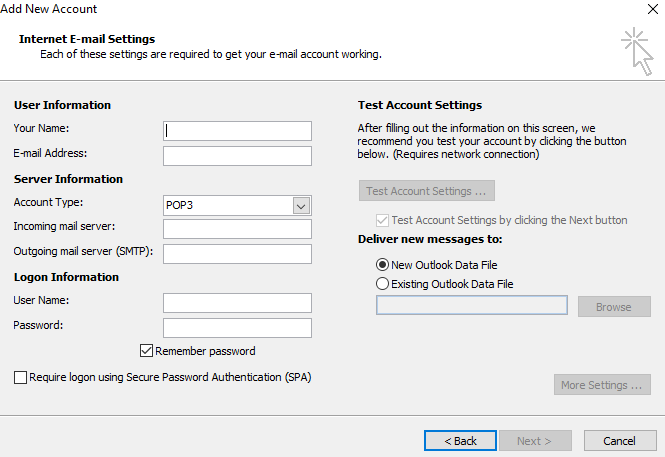
3. Enter Your Name and full E-mail Address.
4. If you want to configure on IMAP, select IMAP for your Account Type. If you're not sure, select POP3. Use these settings for your incoming and outgoing servers, depending on the type of email you have:
POP3
Incoming mail server: mail.yourdomain.com
Outgoing mail server (SMTP): mail.yourdomain.com
IMAP
Incoming mail server: mail.yourdomain.com
Outgoing mail server (SMTP): mail.yourdomain.com
5. Enter your User Name (your full email address) and Password, and select Remember password.
6. Click More Settings.
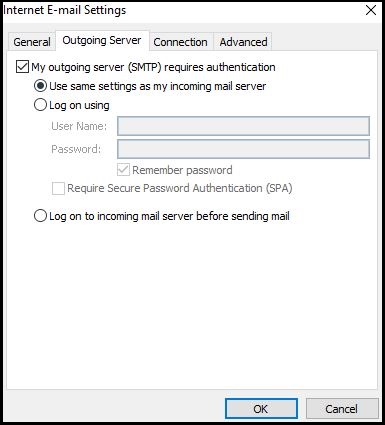
7. Click the Outgoing Server tab. Select My outgoing server (SMTP) requires authentication and Use same settings as my incoming mail server.
8. Click Next. Outlook 2010 will test your settings. When it’s done, click Close.
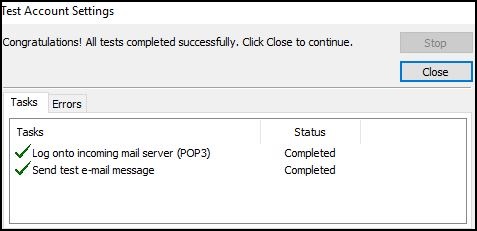
9. Click Finish.
How to set up Outlook 2007
1. In Outlook 2007, from the Tools menu, select Account Settings.

2. On the E-mail tab, click New.

3. Select Microsoft Exchange, POP3, IMAP, or HTTP and click Next.

4. Check Manually configure server settings or additional server types and click Next.

5. Select Internet E-mail and click Next.

6. Enter the requested information:
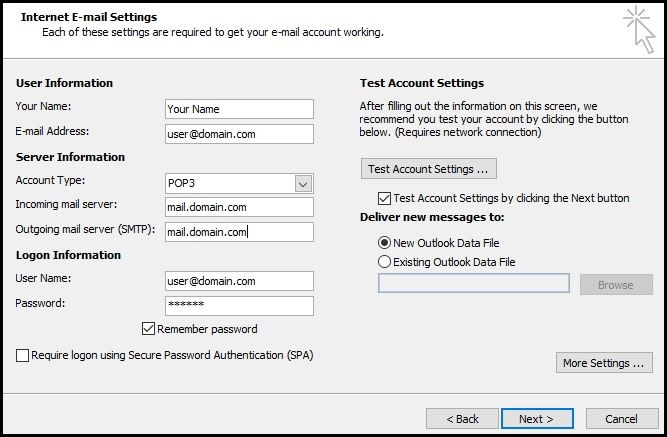
- Your Name: your name
- Email Address: the email address the messages will be sent from
- Account Type: POP3
- Incoming Mail server: mail.domainname.xyz
- Outgoing Mail server: mail.domainname.xyz
- User Name: the full email address
- Password: the password for the email address
7. Click More Settings.
8. On the Outgoing Server tab, check My outgoing server (SMTP) requires authentication.

9. Select Use same settings as my incoming mail server and click OK.
10. Click Test Account Settings to verify everything is configured correctly.
11. Click Next and then click Finish.
<s

